Sunday, August 17, 2014

Organization of My Science Classroom

Tomorrow is the first day of school- at my NEW school! I am beyond the moon excited to welcome those munchins in my room. I kept my organizational system the same because it worked well for me in the past. I am not a cutesy pinterest decorator in my classroom, but I am allllll about function. Here's a tour of my classroom with some overviews of some of my systems that keep me and my students sane!

This is in the front of the room. My students know that they can at any time get any of these materials without asking the teacher. They are responsible for returning them as well. In case you don't have super vision, there are colored pencils, crayons, markers, rulers, scissors, notebook paper, white printer paper, glue, and small  pencil sharpeners. I haven't refilled any of these except the notebook paper in four years, and they allow students to have the materials they need when they need. My students also use interactive science journals in a little different way. They have a binder that is divided into 2 parts: their journal (comprised of looseleaf paper) and their graded HW/assessments. When students forget their journal, which they will, students will grab a sheet of notebook paper and they are responsible for putting that loose leaf sheet in their binder. I have found that this creates a no-pressure no-disruption environment. Students do not ask for a loose-leaf paper - they simply walk up and grab one if they forget their binder.

 On top of this supply shelf are three baskets for my three hours of science. They are the "turn-in" baskets for each hour of science. Students will turn in everything in these baskets. Yes, I have more than three hours of classes. I am also the eighth grade tech teacher for half of my day.
Every Friday, I have a mini-assessment on the week's concepts. I print off 30 mini-assessments or one class set and student answer sheets. When finished, students will turn in their quiz in one basket and their answer sheet in another. 

My most beloved items in my classroom are my flower pens. I know - crazy as a coon - but I love my flower pens. If a student forgets a "writing utensil", they quietly get up, go to the back of the class, grab one, and bring it back to their seat. If you want to see and hear more about my flower pens, I dedicated an entire post here. Missing from this table is a tissue box, and I am awaiting that arrival when the kids come. I put the tissue box in the back because I feel like it gets less visitors when it is out of sight. 

This is a view from the back of the room. Before you start judging, know that it is incredibly impossible to group these desks. If you have any ideas, I would loooove to hear from you. You can see that I have a smartboard and a long whiteboard! There is also a bulletin board to the right of the door, which says Future Scientists. I plan on covering that up with student pictures. 

This picture is an organizational/ storage area for me that students do not have access to. It is where I keep paper manipulatives, goggles, buckets, bowls, teacher books, masking tape, and word wall words. The orange buckets are extremely nice for delivering lab supplies "by the group".  

What are your organizational must-haves? 

Wednesday, July 23, 2014

Making That Back-To-School Checklist

In preparation for the new school year, I am creating a to-do list of items that need to be taken care of before August 18th. This year, one of those items is new: write a grant for field trip.

In the spring, I was working on my master’s degree, and I was inspired to put theory into practice. Research has proven that students learn best by doing. Authentic learning experiences allow them to act out their exploration (Oblinger, 2007). Although this is not radical news, I decided to try to theory into full action for an upcoming botany unit. One of the fundamental objectives of this unit is that students will understand that parts on a parts have a specific goal in the functioning of the plant. Around the school, there are a handful of different plant species, but in some museum, there are countless. Three hours north of my school lies the Field Museum of Chicago. What is special about the Field Museum is that it host the largest diversity of plant species in the world! In my mind, I imagined a lesson in which  students acted as scientists trying to learn about new plants. They walked through the museum, carefully drawing an illustration of the plant, as well as determine what each unique duty must be of each part. Another goal of the unit was to learn about the uses that people employ of plants. Also, in the Field Museum, there are simulations in which students can see plays and act like they are using the plants for traditional purposes. In my mind, this was a perfect example of learning by doing.

The only catch was the cost. To send seventy-five kids north three hours to the Field Museum of Natural History did not come without a price. Therefore, I began my search for grants. I thankfully soon learned that the Illinois Department of Natural Resources funds field trip projects, specifically like the one I had in mine. If you are an Illinois teacher and have goals for your students to learn about Illinois biodiversity, you can fill out the grant proposal here.  After several months after submitting the grant, I finally learned that I have received the grant! Click here to see all of the famous grant school recipients.  After a month of scrambling to get permission trips, buses, lunches, chaperones, and everything fun that comes with a field trip, we were on our way north!

At the museum, the kids had a blast. One of the students came up to me during the day and said, “Mrs. Repking, I feel like a real scientist”. Kids laughed (appropriately, which is always a plus) at the skits that demonstrated how plants were used for human purposes, and others were busy spending hours drawing plants in their botany world. It was a great feeling to know that the kids had so much fun and absolutely loved the museum, but more importantly the kids had the opportunity to learn about so many plant species through acting like a scientist would. They truly had the opportunity to experience authentic learning. I was always a believer in authentic learning, but I never saw the immense power and excitement that comes with it until that day, which brings me back to my checklist. My wish for you is that you will put one thing on your back-to-school checklist that will allow students to experience authentic learning to the fullest. There is no way that as human beings we can make every day like the Field Museum experience. However, if we do one added thing each year, we can slowly and manageably turn our classrooms into 21st century places, where students mimic the real world. So go forth, my teacher friends and warriors, and put that extra item on your to-do list under getting school supplies.


Click here to see my grant proposal that I submitted last year.  


Thursday, May 29, 2014

I Can Only Imagine

When doing STEM projects, I have always imagined a school that completed operated the way STEM projects are done. We shove the desks to the back of the room, and we use them as "working tables". Students are constantly designing, testing, changing, redesigning, and retesting to get a construction that they are pleased with. I've ranted countless times about how great STEM projects are for kids, but what if we completed operated on a higher-order thinking level? Students that completed paced themselves? Chose their own activities?  No rote-memorization. No lines of desks. Here's an inspiring article that got me thinking about the topic. 

Tuesday, May 27, 2014

Moving to a New School

My husband and I recently decided to move back to our hometown. We grew up minutes apart, and both of our families still remain in the area. You may have read my post here about how dreadful I was of the job hunt, which is why I am so excited that a new school has given me a home for next year! The more exciting part is that I wanted to teach at this school for such a long time, and I am teaching three classes of science and three classes of technology. Seriously, this is a match made in heaven for me! I am beyond excited to start the new school year, and I trying to hang onto the threads of motivation that I still have for this school year... #lastweekofschool #whyisthereevenalastweek


Monday, May 26, 2014

STEM Project: Glider

The school year is flying by in gliders! This week, students must construct a glider that will fly a total distance of 7 meters. By constructing gliders, I wanted students not just to use their imagination and creativity and  practice the engineering process, but I also wanted them to learn a few scientific concepts along the way. The scientific concepts are below:
1. Students will understand and apply Bernoulli's principle.
2. Students will understand and apply Newton's second and third law of motion.
3. Students will understand and apply thrust, drag, lift, and gravity.

STEP ONE: MINI-LESSON and RESEARCH
Before touching any material used to construct a glider, students had to research a few things. I wanted them to understand Bernoulli's principle because it wasn't a concept that students were going to just "come to". Therefore, I did a mini-lesson about Bernoulli's principle. Here's a great video to help explain Bernoulli's law and how it relates to Newton's third law of motion.


After the mini-lesson, students went to the computer lab, and researched glider designs. All of my students have a school google account. Therefore, they used the drawing feature on google drive to create a plan with their partner for three possible glider designs. Here's a couple screenshots of their planned gliders.


STEP TWO: CONSTRUCTION and TESTING
Now begins the fun! Students have a limited budget and they can buy materials for a cost. For example, a cereal box cost them $4.00. A sheet of newspaper will cost then $1.00. I always always try to find very inexpensive or no-cost items. Students spend an 1-2 entire days constructing, testing, redesigning, and retesting their glider. I am lucky to have a classroom that is 8.5 meters long. So, I just mark off 7 meters as the "test zone" in my classroom.


STEP THREE: PRESENTATIONS
During presentation students talk about what their original design was, how it changed, why they changed it, what their largest challenges were, and their biggest successes were. They then have three attempts to fly their glider past the 7 meters zone. This week, it was nice, sunny, and windy. So, we presented and tested them outside.


OPTIONAL STEP FOUR: SCIENTIFIC PROCESS
We didn't do this step this week, but if you had more time, I think that it is of great value. Students pick one variable they want to change on or about their glider (wing material, wing shape, wing length, body shape, initial flying height, etc). If their variable was initial flying height, they then might test the variable at three different heights (1 meter, 1.5 meters, 2 meters). They will record how far their glider flies at all different heights in a data table and calculate the probability to determine the most successful change. They will do this for three variables of their choice.


STEP FIVE: REFLECTION
This step is critical for students to learn to put the academic vocabulary with the project concepts. Students will complete a few questions about the glider project with their partner that they worked with.

I hope that this tutorial helps if you are planning a project about Bernoulli's principle/ Newton's 3rd Law of Motion.

Monday, May 19, 2014

STEM: Action Research

As a part of my master's class on action research, I conducted research about how much the students are actually learning science in my classroom. Sounds kind of crazy right? How much are the students really learning about kinetic and potential energy when we do the catapult challenge? Are students really learning about insulators and conductors when they create a stylus or is this just a fun challenge? So, I set on my exciting, riveting action research journey. I am a big fan of action research... This busy class assignment just came when I was moving, changing jobs, going to weddings every weekend, etc. Too busy = master's classes not fun. Anywho, here's the down and dirty of what I discovered is happening in my own classroom. The students are learning the overarching concepts. For example, students are learning that more potential energy = more kinetic energy. Heat is conducted more efficiently by a metal than a cloth. However, students need the academic vocabulary to scientifically explain these concepts. Students need an academic lesson on the vocabulary of insulators and conductors. kinetic energy. potential energy. I am IN LOVE with STEM projects. They teach students critical problem-solving skills, perseverance, the engineering process, and they feed the natural inquiry of children. I would adore a curriculum that had a STEM curriculum to go with every scientific learning standard. While I am working on that, I work in peace knowing and having the data to prove that students are learning scientific concepts as well during these crazy chaotic project times.

Friday, May 9, 2014

STEM Process: Day 5

Today, students finish up their variables that they are testing. After they finish their variables, they answer reflection questions about the entire project and how it relates to scientific concepts. In this case, students are reflecting about the relationship between the potential and kinetic energy of their catapult. That concludes our catapult project! I hope your students had as much of fun as mine did doing this project!

STEM Process: Day 4

STEP FOUR: PRESENTATIONS
Today, students present their catapults to the class. In their presentations, they explain what their original idea is and how that idea and design changed throughout the construction process. They then have three tries to make it in the center target.


STEP FIVE: CHANGING VARIABLES
Students now are going to change a variable on their catapult. For example, they may change the material that they wrap around the marble. They may first wrap the marble in tape, and test the accuracy of the launch multiple times. Then, they may wrap the marble in string, and again test the accuracy of their launch. Then, they will wrap nothing around the marble, and test the accuracy of the launch. They must test three variables. Some variables that are commonly tested are 1. how far the launcher is pulled back, how many rubber bands are used, the location of the placement of your catapult, the base of the catapult, the length of the launcher, and the material of the launcher. After presentations, students spend today testing three variables of their choice. Students record this data in a data chart in their packet.

STEM Process: Day 3

Students are continuing their construction efforts with their STEM project today. In this particular project, the students must design a catapult that can launch a marble in a center target that is 3 meters away. I've separated my room, and I put the desks in the back of the room, and the "launch center" in the front of the room! Holy Moly! Flying Marbles! 


Front of My Room: 

 Back of My Room

 The Target... Ignore the green tape.. That's for another project. 
Students get full points if their catapult makes it into the small circle and 85% of the points if their marble lands within the larger circle. 


Wednesday, May 7, 2014

STEM Process: Day 2

STEP THREE: CONSTRUCTION
This is the meat and potatoes of STEM. This is the construction phase. Students now build their structure using the materials that they purchased and the ideas that they feel will work. As they are building their structure, they are revising it from the feedback they are getting as they are testing the structure. For example, they may start out building their catapult one day, decide it will definitely not work as is, and rebuild it completely a new way. They can "return" undamaged supplies to the store to add that money to their "account".

Monday, May 5, 2014

STEM Process: Day 1

As a lover of STEM, I have developed a structured process for all of my STEM projects. This guided process helps the students on two different levels.
1. The students learn to follow the engineering process.
2. The process allows students to have a structured routine of organized chaos. Students who know what they're supposed to do = Happy Teacher!

Before I start getting into the nitty-gritty, all of my STEM projects involve around students creating a device that performs a task within constraints. For example, students in the past have had to create a catapult that launches an item into a targeted circle that is three meters away. Students have had to create a wind turbine that uses wind power to lift ten pennies. When creating these devices, students can "buy" materials with a set budget that I give them. They have the freedom to use any of my materials, but they cannot exceed their cost. This budget is a large part of their constraint... kinda like the real world, huh? haha

STEP ONE: RESEARCH
There is no need to reinvent the wheel in this technological information age when students are given the project details. Students research what engineers have built in the past. They research the pros and cons to each design. They may research past designs in the computer lab or we may watch a few videos in the science room if the computer labs are booked. This week, students are learning about potential and kinetic energy via a catapult or trebuchet. So, students watched this video.

STEP TWO:
Students are given information about the materials that they have to work with, as well as the cost of the materials. They have a specific budget that they cannot go above. Students must come up with a design with their partners, as well as fill out a budget sheet of their expenses for the design that they have in mind. I always let my students return undamaged materials. Students will also come up to the "store" to demonstrate what they are thinking with the materials to the others in their group.

Materials at the store
 Group Planning (above and below)
 Students using materials to explain their ideas to their classmates. 

Don't you just love my photoshop skills? LOL


Thursday, May 1, 2014

We went on a trip!

April 29 had been an anticipated day for a while. In the fall, I began writing a grant for a field trip to The Field Museum to Chicago! About a month ago, we found out that we had received the grant and we're going to Chicago. We had a great parent response and had approximately 20 chaperones for our sixty-five kiddos. It was wonderful! The kids were not only SO excited to be in Chicago, and they were so grateful during the entire trip. Email me if you live in Illinois and want to take a field trip. I can hook you up with a great grant!


Wednesday, April 23, 2014

Packing Up!

All good times must come to an end. This week I have begun to pack up my classroom. sad face. sad face. sad face.  At the end of the school year, I am leaving the school I am currently at. My husband and I both grew up in the same hometown, and both of our families still live in the area. When we first married four years ago, we moved away from our hometown for my husbands job. Three hours away makes it a nuisance to drive back for every birthday party, anniversary party, and family event. So, when my husband got a job offer in our hometown, we put our house on the market and packed our bags. But, now, I am on the dreaded job hunt.  I know its early. Its only April. I just highly dislike the job hunt. If I could, I would pick up my current school and move it to my hometown. I love my school. the students. the teachers. everything about it, but all good things must come to an end. What about you? Have you changed schools at all? What made the process easier?

Tuesday, April 22, 2014

Earth Day

With Earth Day being today, there was a lot of buzz about conserving our Earth! I am a huge advocate of being "green", and the more I learn about it, the more committed I am to the cause. Earth Day came with perfect timing this year because we just finished our Wind Turbines! I also think it is important to talk to the kiddos about the 3Rs. Our school is huge into recycling paper. Kids will remind each other to recycle paper instead of throw it away. We also talk about conserving energy. We are fortunate to have HUGE windows in our classrooms. So when the sun is shining, we let it shine on in! We turn off a couple lights, and you never realize that they were once on! There are also some things I have tried at home - cloth napkins, reusable cloth shopping bags, and composting. I am inspired by this family who only has one quart of trash a year! ONE QUART, PEOPLE! That's crazy! crazy awesome! Anyways, what do you do to reduce, reuse, recycle?

Tuesday, April 15, 2014

STEM?

During the past year, I have been working on my masters. Kudos to anyone/everyone who has finished their masters. Geez, it's a lot of work! I am in the progress of getting my masters in Curriculum and Instruction from the American College of Education. With a few months left, I can say that I have really loved the program. I love the flexibility that an online degree offers, and I feel that I have truly become a better teacher because the assignments were super applicable to my classroom. The class that I am currently taking is centered around action research. In the next four weeks, I am going to study the effects that STEM projects have on my students' learning. Now- that may sound crazy obvious! The students are applying their newly-learning science concepts... true. The students are engaging in real-life problems... true. The students are learning engineering skills. true.true. and true. But what measurable effects does STEM have? How can you show that STEM education is amazing through hard data? I am a lover of all things STEM because I can see how awesome it is in the classroom with my own two eyes. Last week, a student was sad that he was going on vacation to the Caribbean because he didn't get to build wind turbines! ARE YOU KIDDING ME? lol! I can see that they love it and it is 1000% engaging. However, I need to be able to back up what I see with my eyes on paper with real data. Anyways, for the next few weeks, I will be posting about the advantages and disadvantages of STEM with hard data about student learning. What do you track when you do STEM projects? How do you track it?

Friday, April 11, 2014

Wind Turbine Showcase Part II

Happy Friday! Today is the official start of our spring break, AND the weather is awesome! Can you beat that? Today, the kiddos finished up their wind turbine, and they had some awesome, really unique designs! If you missed part I of this blog post, click here. Enjoy the pictures and video! You can find the complete student packet here to begin your own wind turbine project!


Wednesday, April 9, 2014

Wind Turbine Showcase Part I

Wind Turbines? Im a big fan! Toooo punny! Okay, I'll stop. Anyways, wind turbine construction is taking longer than normal in the 7th grade this year. So, I only have a couple of pictures of completed turbines. I am amazed at all of the different designs that the students have come up! Normally, we watch a short PBS video about standard horizontal axis wind turbines, and the kids generally come up with the same idea. This year, I switched it up a bit, and the kiddos had to research horizontal and vertical axis turbines. I never told them anything other than explaining what a horizontal and vertical axis turbine was with my hands. But, anyways, here you go! I'm so proud of them!


It's a WIIIIINDY day in 7th grade!

I have been excited for this week for a loong time. Not only because it is the week before spring break (yahhhooo!), but also because it is.... (drum roll pleassse) wind turbine week! I have become a HUGE fan of clean energy. My husband and I are beginning to build our home this summer, and I would love to go off the grid if we had an unlimited budget. Anyways, since there will be no wind turbines and solar panels on our new home (yet), I wanted to spread my love to wind turbines to the class.. and I guess teach them a thing or two about energy conversions and engineering design. Yesterday, students spent all day researching two different types of wind turbines: horizontal axis and vertical axis. Today, they spent most of their time in planning and the little time they had left constructing their turbine. They only get X amount of dollars to spend on materials for their turbine. The goal of their turbine is to lift 10 pennies 30 cm off the ground. I will be back tomorrow with pictures of all of the crazy awesome designs that they come up. Because it is the week before my spring break and I'm feeling super awesome about it, I'm also going to put the entire packet for this project free on my website for a week! Have a great rest of the week!

Tuesday, April 8, 2014

Clap Along if You Feel Like a Room Without a Roof!

One of my favorite things to do is listen to music, play music, sing along to music. I have always loved music. I feel like it creates a very happy and fun vibe in the classroom. Obviously, I want the kids to listen to school appropriate, even motivating music! Here are some tunes that I have on my school playlist that I jam to in my classroom: Happy! by Pharrell Williams Stereo Hearts by Gym Class Heroes Good Feeling by Florida and some oldies... Best of My Love by The Emotions Can't Buy Me Love by The Beatles I Can't Help Myself by The Four Tops I Got You by James Brown Little Bitty Pretty One by Thurston Harris I am a lover of all music, but I honestly feel like the older music works best for a learning envrionment because the kids still get that "fun vibe" feeling, but they honestly are not as excited and dancing to the new music... like Good Feeling. I'm not trying to go all granny here, but I do feel like I will only add more very upbeat and older music to my playlist. With that said, I love listening to music in the classroom, especially right now as they are constructing their wind turbines... more on that tomorrow!

Wednesday, April 2, 2014

Frog Dissection: 3 Days In

I am in love with frog dissections! Today, we dissected the internal structures of the frog, and I love how the kids are so engaged and intrigued by everything they see! They are so amazed and so excited to learn each system of the body. We dissected and learned about two systems today: digestive and circulatory. I feel like this is the most engaging way by far to teach the relationship between cells, tissues, systems, and the body, which is standard LS1-3 that states "Use argument supported by evidence for how the body is a system of interacting subsystems composed of groups of cells". Anyways, I have fallen in love with frogs! I totally recommend frog dissections to any life science middle school teachers who are leery about this activity!

Tuesday, April 1, 2014

Frog Dissection: It's a ribbeting day!

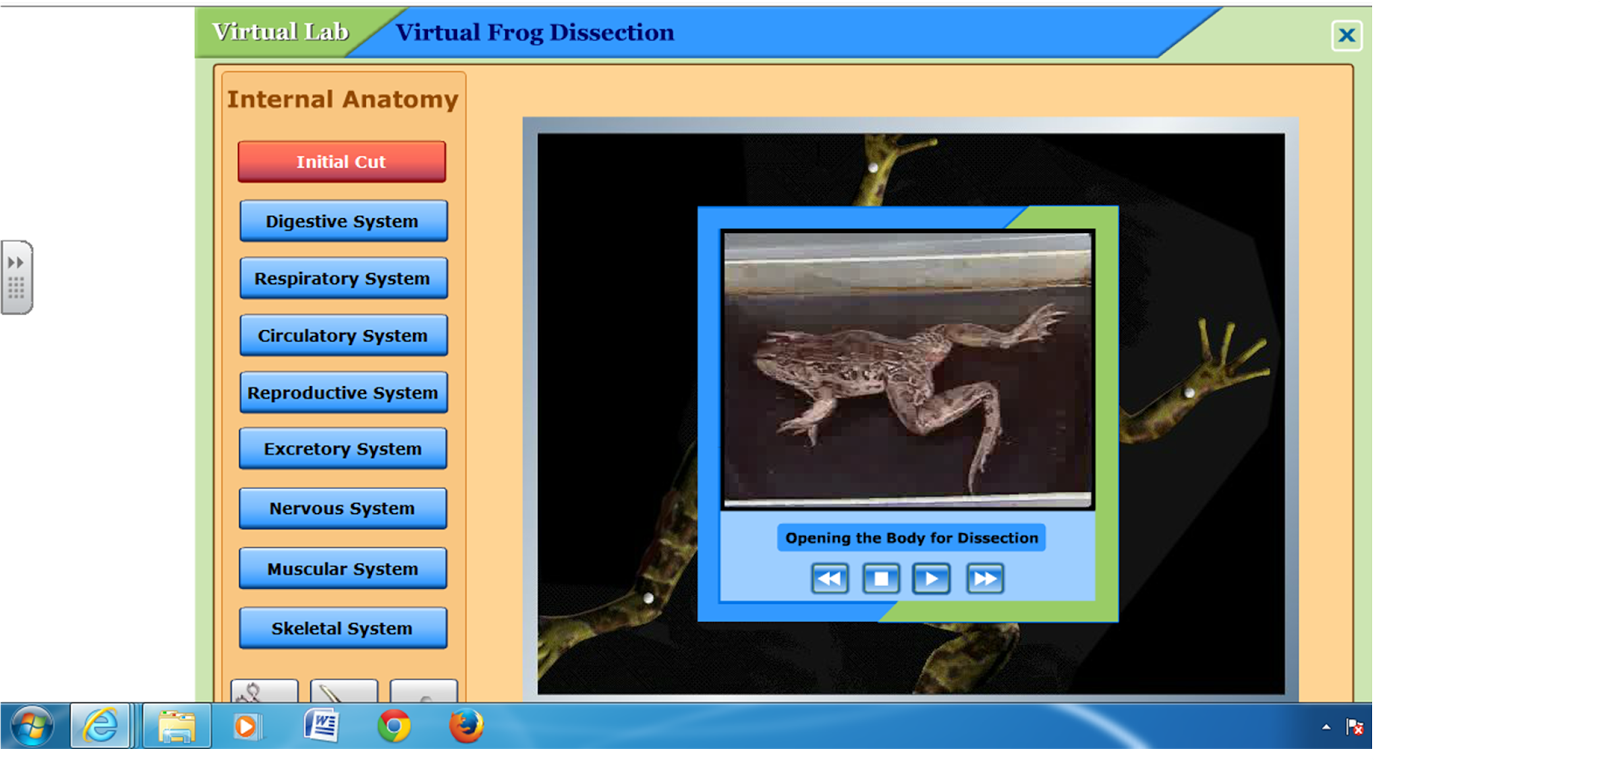
Who knew 10 years ago I would be standing in a formaldehyde-smelling room taking out frog tongues? SURPRISE! Yesterday and today, we dissected the external parts of the frog. On Monday, they made observations about the dorsal (new vocab word) and ventral (new vocab word) sides of the frog. Today, we dissected and learned about the anatomy of a frog's mouth. But, we are getting to the heart of the frog dissection tomorrow and the rest of the week. I recently stumbled across an AMAZING website that guides you through the internal systems of the frog. One reason that I love it so much is because it is very difficult for kids to see what I am talking about when I point to one tiny aspect on one tiny frog. We are using northern leopard frogs by the way. This website takes you step-by-step through the process of each system of the frog.  Anyways, I thought I would share my little bit of heaven website:
http://www.mhhe.com/biosci/genbio/virtual_labs/BL_16/BL_16.html

This website is wonderful! Do you dissect? If so, what do you dissect? I have heard that the bullfrogs are SO much better than the leopard frog to dissect, but I don't know if it is worth the $$.. What are your thoughts?


Thursday, March 27, 2014

Frog Evolution Flipbooks

Frogs. Frogs. and more Frogs. This past couple of weeks we have been swimming in frogs! A couple weeks ago, I got a crazy idea to have a thematic unit.. not on ecology, cell biology, or genetics... but on frogs. We are learning about frogs as we cross off ecology and evolution standards. Today, we made a flipbook. We read an article about the fossils that were found that scientists believe are ancestors to frogs today. We then used the fossil descriptions from the article to imagine and draw picture of what the frog looked like. They had to put on their scientist hat to use scientific reasoning, as well as their artist hat to visualize a picture and draw it. You can see the full set of directions and article here. They also had to answer some critical thinking questions about their flipbook after creation.
Here are some pictures of some images that came to mind when students read the descriptions of the fossils.
They even have some scientific names!
Same species... Different Student Images
They had to guess at a time period that has no frog ancestor fossils. 

As a teacher, I really like how this lesson incorporated a literacy skill, such as imagination. This project gave students motivation to really understand and picture what the article was explaining. I could also assess students' comprehension of the article by their drawings of their flipbooks. I feel that it is difficult for science teachers to constantly incorporate authentic on-topic literacy in the science classroom on a consistent basis! What do you guys think? How do you incorporate literacy in your classrooms? I know that's a verrrrry broad question!


Wednesday, March 26, 2014

Writing Utensil Crisis

In every middle school that I have been in, there has always been a writing utensil crisis! The kiddos lose their writing utensils faster than they can run! I love them but geeezzz... I used to keep a stock of pencils until I bought two boxes for $30 and they were gone before 1st quarter... Then, I decided to have them write their name on the board when they took a pencil... thinking that I would have a waaay slower rate of the pencil disappearances... As scatterbrain as I am, I was forgetting their names on the board at the end of the hour more than kids were forgetting pencils! So, I decided to create my own no-disruption, easy peasy fix to this crazy mess... which how crazy is it anyway that we can get so disturbed by PENCILS!... Anyways, here's what I have done for 2 years, and I looooveee it... more than I love chocolate, which is a WHOLE LOT!

I first buy the most obnoxious bouquet of flowers that I can from the dollar tree, as well as flower tape and pens! After all, you want to deter kids from using these unless they have no other alternative.  I already had the pens. I bought the flower tape 2 years ago when I started this, and its still going strong!
I then cut the flowers so that they had about three to four inches of stem. You can do this with a handy scissors, but a wire cutter works best!
I then secured the flower to the pen with floral tape.
Like magic, I had created my flower pens for 2 dollars!
I have a little clay pot in the back of the room where they stay. If a student needs a writing utensil, without asking me (because I never want to hear that question again), they go and get a writing utensil from the back of the room... No loans for pencil boxes + no classroom disruptions over pencils =  happy teacher!


Like everything, they will be accidentally taken out of the room, stolen, lost, or damaged... However, I had ten at the beginning of the year, and I am just replacing them now in four quarter! Ten pens for $1 + One bouquet for $1 + Flower Tape for $1 = a Priceless peaceful three quarters! I tell everyone about my flower pens because they have made my life so much easier!! What kinds of things do you do in your classroom to solve the pencil crisis?